Pages

Share butons

Wednesday, March 13, 2013

Sugar and Carb Free Hot Coco

Sugar and Carb Free Hot Coco

I know I haven't blogged in a while, life has been crazier than normal the last month. New niece born, engagement in the family and starting a new way of eating. It is this new way of eating (inspired by the Trim Healthy Mama book) that brings us to this post. I made hot chocolate last night that was not only sugar free and carb free, but delicious and good for you. Ya, right you say. I am serious this really good for you.
  • 1 cup almond milk
  • 1/2 scoop whey protein powder (isolate is better)
  • 1 TBL coco powder
  • pinch of salt
  • dash of vanilla (the real stuff is better)
  • dash of NuNaturals stevie or about a tsp of truvia (this is really to taste)
  • optional- if you want it really creamy you can add a dash of cream, but this will add some fat to it.

Blend this all together well and heat up. The beauty of this recipe is that it is low fat, low carb and high protein. It make a perfect nutritious snack and if you eat Trim Healthy Mama style (more about this later) this would be a fuel pull. =)

As a side note if you are looking for a healthy way of eating or losing weight look into Trim Healthy Mama. I am really enjoying it, it doesn't make me feel hungry, I am eating good healthy food and it is good tasting food. When I have some significant progress to report I will do a better review on here. For now just know it is worth checking out. =)


This post is now linked up to Trim Healthy Tuesday put together by Stacey Makes Cents and Gwen's Nest

Friday, January 11, 2013

Easy No-Grate Homemade Laundry Soap

Easy No-Grate Laundry Detergent

Our house has a lot of eczema, soap and scent allergies, which means it was doubly important for me to find a way to make our own laundry soap. We needed something allergy friendly and I wanted something that didn't bust the budget, but some of the grated, cooked and stored in a 5 gallon bucket detergents seemed a little overwhelming and time consuming for this busy mom (who just wants to quickly get her laundry done).  Then I came across the idea of no-grate laundry soap here http://www.onegoodthingbyjillee.com/2012/02/no-grate-homemade-laundry-soap.html   with some reworking I came up with something I am happy with. It cleans great as long as I pre-treat stains (which I had to do with regular detergent too, as my "little Loviehas a way of majorly staining all her clothes)

Here is what you need:
  • 4T Borax
  • 4T Washing Soda
  • 3T Dawn (or other grease fighting) dish soap
  • 3T Oxi Clean (optional)
  • 4C Boiling water
   Mix all ingredients together in glass bowl (the measure cup works fine) until powder ingredients dissolve. I use a whisk to do this, but don't whip to hard or you will have a bunch of bubbles. Once it has cooled a bit, you can pour it into an old detergent container (or whatever container you have handy). It is as easy as that.
I use an 1/8 to 1/4 cup per load depending on the load size. If I am doing a white/light load and I want to brighten it up I fill up the bleach container(not really sure what you call it) with peroxide.
 This works great in front loader (this is what I have) and HE washers. 
Let me know how this works for you, or if you find a way to make it better. I am always looking for new ideas. =) 

Friday, January 4, 2013

Easy Homemade Bread

Our Favorite Easy Homemade Bread

(made in a Bread machine, but baked in the Oven)

We love homemade whole wheat bread. My mom usually made 5 loaves at a time, but as a busy homeschooling mom of 2 young children I needed something easier and quicker. I discovered I can use a 2lb breadmaker that I found on garage sale for $5 to make 2 loaves fairly easy and they still turn out as good as "non-breadmachine bread". 

 A few things that I think are important for good bread are baking the bread in the oven not the bread machine and using fresh ground flour. I have a flour mill and grind my own, but if you don't have that option try looking for a friend that would let you use theirs or a flour mill in your area. Make sure to freeze your flour until you use it to keep the nutrients in it. All that being said, here is the recipe that we love...

Oatmeal Honey Bread
(3lbs from a 2lb breadmachine)
  • 1 3/4 cup Water
  • 2/3 cup Milk (or Almond milk)
  • 3T butter
  • 5T Honey (or brown sugar)
  • 3t Salt
  • 5 cups Flour (In this measurement I use 3T gluton flour and fill the cup up the rest of the way with all purpose flour and then use 4 cup fresh whole wheat flour)
  • 1 cup Oats
  • 4t Yeast
  Start by heating your water in the microwave for about a minute to a minute and a half, add it to the bread machine bread pan along with the milk, butter, honey and salt.
Next add the flour, oats and yeast. 
(Take care not to scoop out the flour with the measuring cup, but to spoon it into the measuring cup and level it off before adding it. This makes a big difference in the measurement. When you scoop with the measuring cup you compact the flour and add to much.)
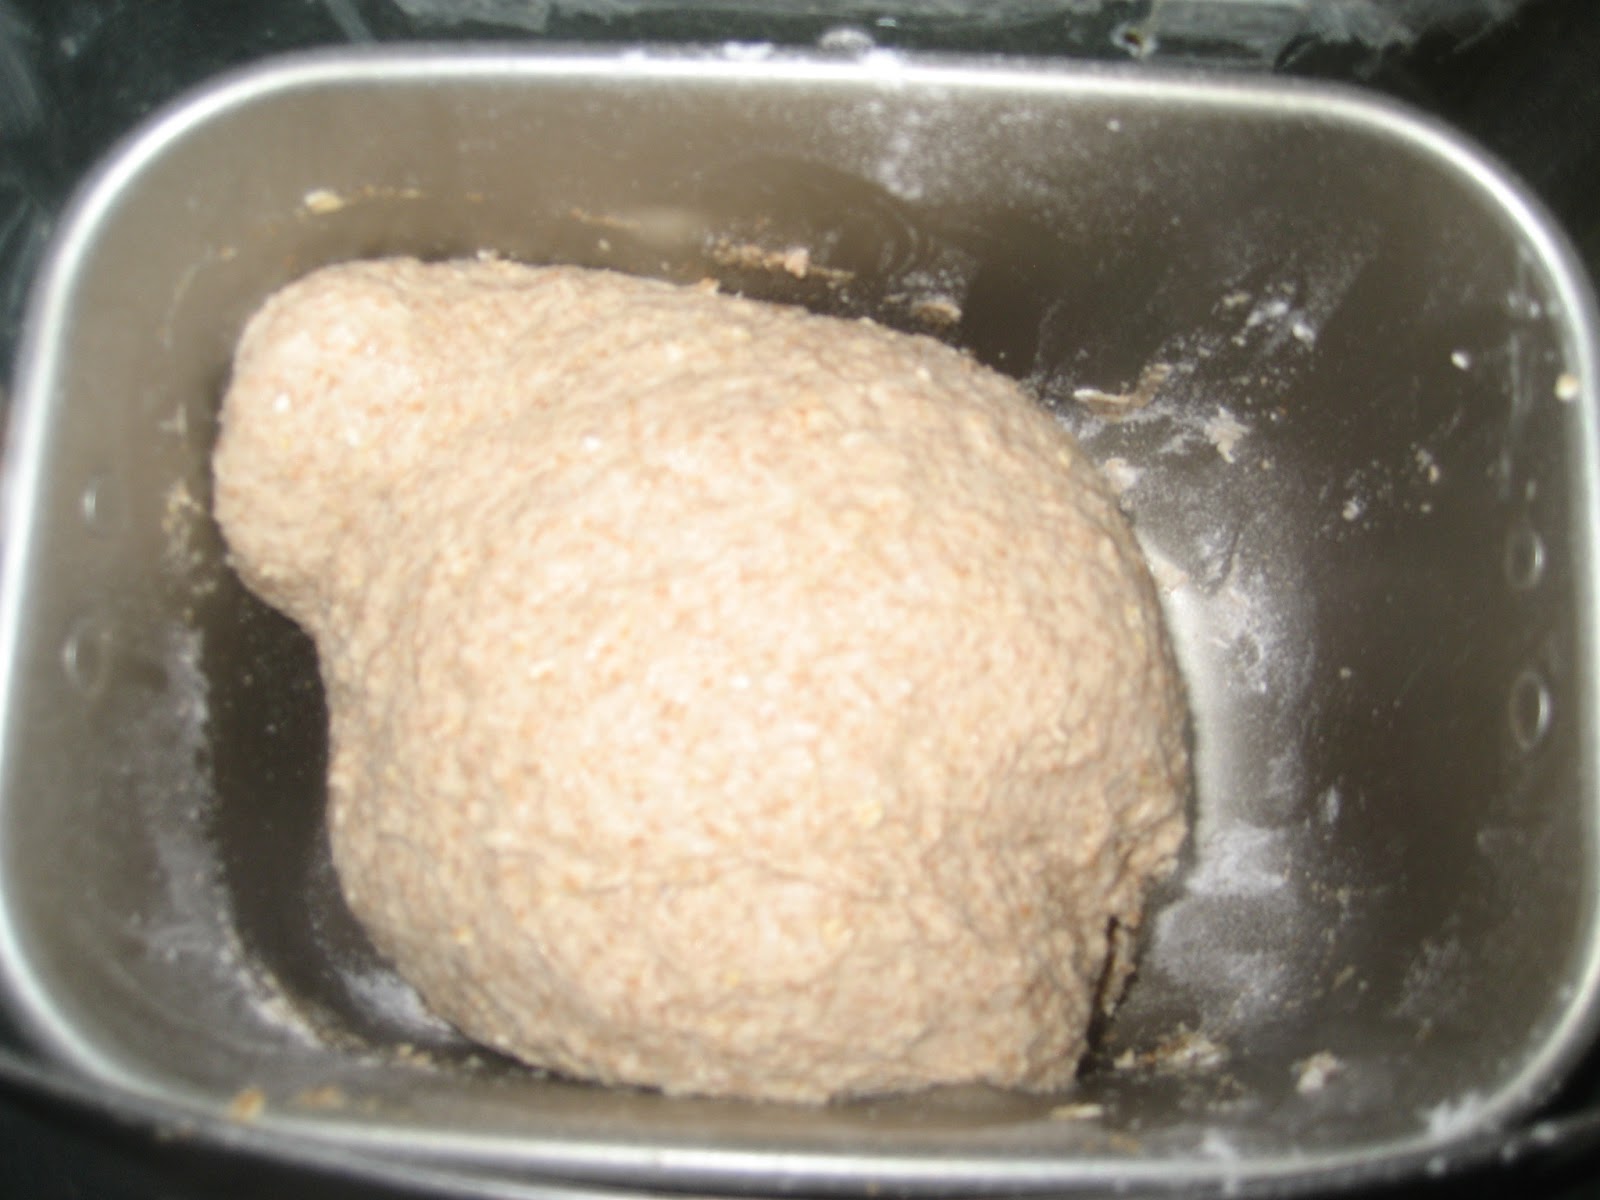
At this point point I turn the machine on, put the pan in, choose the dough setting and press start. Depending on your machine it will either immediately start to mix or wait about 15 minutes to start. After it has mixed for about 10  minutes, check to see if it needs more flour or milk. It should look satiny and just barely be grabbing the sides. 

If it is gooey and really sticking to the sides and a little four until it is right. If it is a big thick dough ball, really dry and not grabbing the side at all, just add a little milk until it just starts to grab the sides a little. Now you can close the lid and ignore for the next hour and a half or until it signals it is done. It should look something like this:


Dump it out onto a greased or flour surface and knead it for a minute or two to work out the air bubbles. Cut it in half...
Lightly  pat out each section into a loose oval about the length of the bread pan and tightly roll it into a loaf and place into well greased pan...
Turn oven on 350 for 1 minute then turn off and place bread pans and container of water in oven for about 40 minutes or until bread at least doubles in size...
Pull out water, turn oven on to 350 and bake for 20-25minutes or until golden in color and bottom sounds hollow when tapped. If needed use spatula to help release bread from sides of pans and tip out to cool...
Now it is time to enjoy a fresh, warm slice of bread, just beware the first loaf seems to disappear right away. =)


Measurements  for 2lbs of dough for 1 lb Breadmachine
  • 1C water
  • 1/2 C milk
  • 2T butter
  • 3T honey
  • 2t salt
  • 3C flour
  • 1C oats
  • 2 1/2 t yeast

Monday, December 31, 2012

Healing Lotion

Hand Softening, Healing, Natural Lotion

Lotion, it should be light, moisterizing and help heal chapped hands, but most importantly it should be chemical free. At first I was intimidated by the idea of making lotion from scratch, it wasn't just melt stir and pour, it was emulsifying oil and water together to make something new. I decided to give a try and it was fun watching it change, it was also easier than I imagined. Try it and see for yourself.
  • 3/4cup Aloe Gel
  • 1tsp Vitamin E oil
  • 3/4oz Beeswax (grated or broken into small pieces)
  • 2Tbl Comfrey
  • 1/4 cup Almond oil
  • 1/4 cup Coconut oil
  • 1Tbl Cocoa Butter
  • 15-20 drops Essential Oil of your choice

  1. In double boiler on low melt coconut and almond oil with comfrey, let it infuse for 45min to an hour.
  2. Strain through cheesecloth, throw away herbs and wipe leftover herbs out of pot.
  3. Pour oil back in pot, add beeswax and Cocoa butter and melt.
  4. In a medium-sized bowl, combine aloe vera gel, vitamin E oil, and essential oils.
  5. Pour the melted oils into a bowl and allow them to cool to room temperature. This is a vital step in order to prevent separation. You can also heat up the aloe mixture slightly in the microwave to bring the 2 mixtures to the same temp.
  6. Once cooled, blend on low speed with hand mixer, slowly and continuously pour in aloe vera mixture. Run a rubber spatula aganist the sides of the bowl to incorporate all ingredients. Blend until the mixture has the look and feel of lotion. (Note: this step could also be done with a blender on low speed)
  7. Pour the lotion into sterilized jars. You can use sterilized canning jars if you have them on hand. I keep a jar on the bathroom counter and one in the refrigerator. The lotion will keep for up to 6 weeks in the refrigerator.
If you are looking for a source for herbs http://www.mountainroseherbs.com/index.php?AID=129244
has been recommended to me as a source for high quality herbs


Sunday, December 30, 2012

Diaper Rash Cream

Diaper Rash Salve 

My little girl has an allergic reaction whenever I use diaper cream on her, so I have been using homemade diaper cream for a while. This one works especially well (and it helps yeast infections(mommies)). No chemicals on your baby's bum, just soothing, moisturizing, natural ingredients.
 
  • 2Tbl Organic Coconut Oil
  • 2Tbl Organic Cocoa or Shea Butter
  • 1Tbl Jojoba or Almond oil
  • 1Tbl Dried Comfrey
  • 2Tbl Organic Beeswax (shredded or chopped into sm pieces)
  • 3 Capsules Shelf stable Probiotics(I talk about them in this post )
  1. In double boiler on low melt coconut and almond oil with comfrey, let it infuse for 45min to an hour.
  2. Strain through cheesecloth, throw away herbs and wipe leftover herbs out of pot.
  3. Pour oil back in pot, add beeswax and melt.
  4. Once all beeswax is melted, pour in jar and let it cool until just before it sets and mix in probiotics.
  5. Allow to fully set and enjoy the peace of mind that comes from puting chemical-free cream on your baby.
If you are looking for a source for herbs http://www.mountainroseherbs.com/index.php?AID=129244
has been recommended to me as a source for high quality herbs


Healing Lip Balm

Better Than Burt's Bees Healing Lip Balm

 I am a bit of a snob about lip balm. It needs to absorb into my lips, not just put a waxy coat on them. I also want it to soften and heal my often chapped lips. Not many can do this, burts bees comes the closest, but even it wasn't quite what I wanted and it is not exactly cheap. After some research and searching through recipes I finally pieced together one that I am happy with. It smell great, feels great and thanks to the comfrey it is healing. Give it a try and see what you think.


  • 1/2 oz beeswax (approx. 3 tsp)
  • 1 oz coconut oil (approx. 6 tsp)
  • 1/4 oz cocoa butter (approx. 1 1/2 tsp) - make this on the heaping or heavy side
  • 2 Tbl Comfrey Leaves
  • 3/4 tsp vitamin E
  • 1 tsp liquid honey
  • 1/2 tsp peppermint essential oil


  1. In a double boiler over medium heat put coconut oil and comfrey and let steep for 45min to an hour.
  2.  Strain oil through cheesecloth, throw away herbs and wipe any remaining herbs out of pot.
  3. Over low heat melt beeswax, comfrey coconut oil, cocoa butter and vitamin E. Use a longish stick or small whisk to stir (a chopstick is perfect).
  4. Remove from heat and add honey and peppermint essential oil. Whisk well and try to distribute oil throughout the mixture - this is tricky. When you make it you'll see what I mean, there are little oil pockets that are hard to stir in.
  5. Pour quickly into clean tins or jars. Stirring mixture as you do so the oil doesn't separate.  Let cool on counter till hard. 
Note:
If you don't have comfrey you can still make this without it and it will turn out more like Burt's Bees Lip Balm, the role of the comfrey is to give it extra healing zip.
If you are looking for a source for herbs http://www.mountainroseherbs.com/index.php?AID=129244
has been recommended to me as a source for high quality herbs


Saturday, December 29, 2012

Healing Salve

Healing Salve  a.k.a. Chemical free Neosporin Plus

Our house has lots of cuts, scrapes, bruises, bumps, rashes and eczema; they seem to come with the territory of toddlers and cause the need for a lot of healing salve. Neosporin works well enough for cuts and scrapes, but it is not chemical free and nothing from the store seems to work for the eczema without hurting or containing cortisone which lowers the immunity. I finally hit on this salve and it works wonderfully. I believe the herbs have a lot to do with it.
  • 1/2 cup coconut oil (helps heal burns, antimicrobial, antibacterial, antifungal and moisturizer)
  • 1/2 cup Extra Virgin Olive Oil
  • 1/8-1/4 cup dried Comfrey (great for healing wounds) 
  • 1/8/1/4 cup Burdock Root (soothes skin irritations and great for eczema)
  • 1/8-1/4 cup Calendula or Chamomile (soothe and heal skin)
  • 2oz beeswax - grated or chopped
  • 15drops Tea Tree Oil (heals wounds, antibacterial)

In a medium saucepan – combine the coconut oil, olive oil, comfrey, burdock root & calendula/chamomile. Cook on medium heat in double boiler for about 45 minutes to an hour, stirring often. You can also forgo the cooking method to get more ‘healing strength’ from the herbs by soaking the herbs in the olive oil for 4-6 weeks.  Then you would follow the rest of the recipe, but you would the coconut oil to the olive oil/ herb mix before adding in the beeswax.
Strain the mixture using a cheesecloth or coffee filter.
 Toss the herbs & wipe out any remaining herbs from your saucepan.  Add the strained oil back to your pot, turn the heat to low. Next add the beeswax and stir until completely melted.
Stir in the essential oil at this point.  Once combined, remove from the heat.
You’ll want to work quickly now as the salve starts to set up rather fast.  Pour into the glass or tin container(s) of your choice. Once it sets up, you’re all done.  Each batch makes 16 ounces.
If you are looking for a source for herbs http://www.mountainroseherbs.com/index.php?AID=129244
has been recommended to me as a source for high quality herbs 


Discalaimer: I am not a docter, just someone who has used this and had good results. Do not use this on serious injuries and because the comfrey heals so quickly don't use it on puncture woulds as the outer skin could heal over the wound without the deeper wound, which would not be good.

Homemade Probiotic Deodorant

Homemade Probiotic Deodorant - Really Works!


In my journey to keep nasty chemicals off my family's skin, deodorant was one of the 1st that had to go and  one of the easiest to make. Here is how to make it:


1/4 cup Baking soda (for anti-stink and dryness)
1/4 cup cornstarch or arrowroot powder (for smoothness and dryness)
3 capsules of shelf stable probiotics* (the good bacteria kills the bad therefore reducing stink)
up to 5T Coconut oil (Moisturizing, anti-stink and antimicrobial)
10-15 drops Peppermint essential oil (optional)
Mix together the powders and then add enough coconut oil (it mixes in easier if you soften or melt it) to make a thick paste, add the essential oil if you want it and you have natural and frugal deodorant that really works. All you have to do now is put it in a sterile jar for storage. Using it is a easy as getting a small dollop on your finger and rubbing it in well under your arms. Make sure it is absorbed well so that the oil does not stain your clothes.

NOTES:
-Shelf stable probiotics should contain highly resistant beneficial bacteria such as lactobacillus and bifidobacteria. These “good bacteria” have the ability to survive the pH of our stomach acid during digestion and are the one’s that should be included in this recipe.
-If you have sensitive skin and the baking sodaq bothers you, try replacing it with arrowroot powder.